Several questions come to mind each time we are starting a new React Native project:
- Which logical architecure am I going to use for my app?
- Why should I retain this architecture over another?
- What are the pros and cons of previous experiences and how can we compose a better architecture for the new application?
- How can I secure my development cycle for writing a maintainable UI?
In this blog post, I will attempt to address these questions and expose my approach for crafting a React Native app. We wil be focusing on Redux, since it is often our defacto pattern for structuring state and data mutations.
What is the best way to generate a React Native application?
Let’s start at the roots. This is usually one of the first questions I am faced with. Should I fork a boilerplate? Create folders and files manually or use a dedicated generator command?
In most cases, I think you should opt in for one of these vendor-provided React Native commands : react-native init or react-native create-app
Let’s compare them and see the differences.
- react-native init:
Running this command will create among other things two folders: One for android and an ios. These folders provide you the ability to add modifications related to each of the respective native platforms. In other words, the flexibility to alter Java or Objective-C/Swift code as you would do with a regular Xcode or Android Studio project.
As of the rest, react-native init installs all necessary components to start developing your RN app.
- react-native create-app:
Running this command, will generate something entirely different from the react-native init.
The created application will have an architecture based on a boilerplate defined by Dan Abramov (creator of Redux and member of the React core team), neither an android nor an iOS folder, but an expo folder. My recommendation:
If you are new to React Native use the
react-native create-appas you will not have to deal with configurations.
The downside is that you will loose the ability to add some modifications in the native platform code. And that’s what really embarrasses with the “black-box” abstraction that expo brings to the application structure.
That having been said, you certainly figured that I prefer using the first command – react-native init– because it makes the process of altering/writing native code in React Native, natural and straightforward.
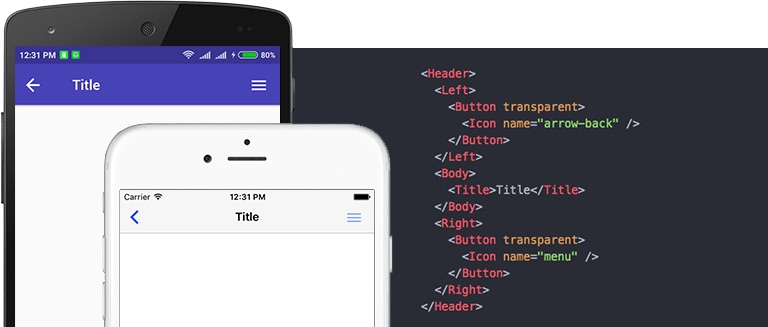
What are we going to use as a library for the UI?
After a deep search, I found two libraries that are useful for the UI development the first one is NativeBase and the second is react-native-elements. Again, let’s compare them and see which one outruns the other, not only in terms of UI and visuals, but also regarding flexibility and ease of integration.
- NativeBase: As mentioned in their introduction,
NativeBase is a free and open source UI component library for react-native to build native mobile apps for iOS and Android platforms.
This library is rich in components. You can find what you really need most of the time, and more. Yet what really impressed me was its flexibility of use with react-navigation and many other libraries
Speaking of routing, routing is a major topic in React Native and React apps in general. We usually use react-navigation as our default routing library for its simplicity and active community, but you should know that there are other alternatives.
- react-native-elements: A cross platform UI toolkit. This library limits its components to the minimum. It is easy to setup and integrate, and has no strict opinion about how you should implement your design.
The choice of the UI library or approach you will use depends on the dimension and complexity of the app. If you are going to create a simple application that does not require many components, I recommend you go for react-native-elements. On the other hand, if you are going to create a fully-fledged component-rich application that needs to be integrated with some other library like redux-form or react-navigation, I think that NativeBase would be more suited in this case.
One last note, please keep in mind that there are other popular React Native UI libraries such as Shoutem and Nachos, and that you can also design your own library! As a matter of fact, the native React Native components provided by Facebook are more than enough to build your own styled components on top of them.
What architecture should I follow for managing the data and logic of my app?
I think this is the most sensitive point when starting a React Native project. In particular, this the critical question I ask my self: How am I going to design the way data mutates and travels across components?
React is an amazing library when it comes to brining managed state to your view. But the designers of the library have made their intent quite clear since the beginning: React is only th V in MVC (if you are using MVC). It provides no support or conventions for how data (states) should be organized and exchanged (props).
This is when Redux comes on stage. Redux is a way of designing the state of your app and how it changes over-time. It is worth noting that Redux is a React-agnostic project with implementations in other libraries than React. You can read a lot about it and learn it on the Redux website.
Yet, even if you chose to go for a Redux approach, there are different ways to redux things that we will discuss in future posts. For today, I am just going to advise you on how to chose your Redux design (assuming you are going for Redux)
Here’s the way I see this. Ask yourself this question: What is the dimension/complexity of my application?. Based on your answer you should go for one of these ways:
-
Small application: You can use the simple way of putting in place a redux application as described in the redux documentation (Ex: one file for the entire state, no async callback hustle)
-
Large application: I recommend separating data flows and concerns as topics, using this approach you will have a clean, re-usable and maintainable architecture. The design by topics, is a pattern that is gaining in popularity not only in the React world, but even outside of JavaScript such as in Rails apps. It allows to avoid confusion between the notion of
entitiesandinterests. Google it :)
Last but not least, you should be aware that there are other ways to design your app data logic without Redux. These include Facebook’s Flux (from which Redux was inspired) as well as the old-good Presentational/Container components approach.
Wrapping things up
In this post I shared with you my thoughts about how I draft my ideas up before tackling a React Native app project. I did not cover the details of each aspect, nor did I mention other amazing libraries and tools I am using in our RN stack. But I hope I enlightened you about the questions that should be asked prior to embarking on your development journey.